Friday 22 February 2013

Final Images of Miss Havisham


These are my final images of Miss Havisham. I have noticed that my model is too young to be Miss Havisham, but I have tried my hardest to make my model looks older. I am still pleased with the final outcome I produced. Especially on the technical skill of creating the under eye dark circles, I think the dark circles looks pretty real! To be honest, the actual make-up I produced in real life was quite theatrical, but the theatrical effect just balanced out with the studio lighting. Luckily the studio lighting makes the effects looks softer! I know it's kind of cheating by relying on the studio lighting, but I think overall I have done a fantastic job!


Wednesday 20 February 2013

Create Miss Havisham Final Look


Make-up Process


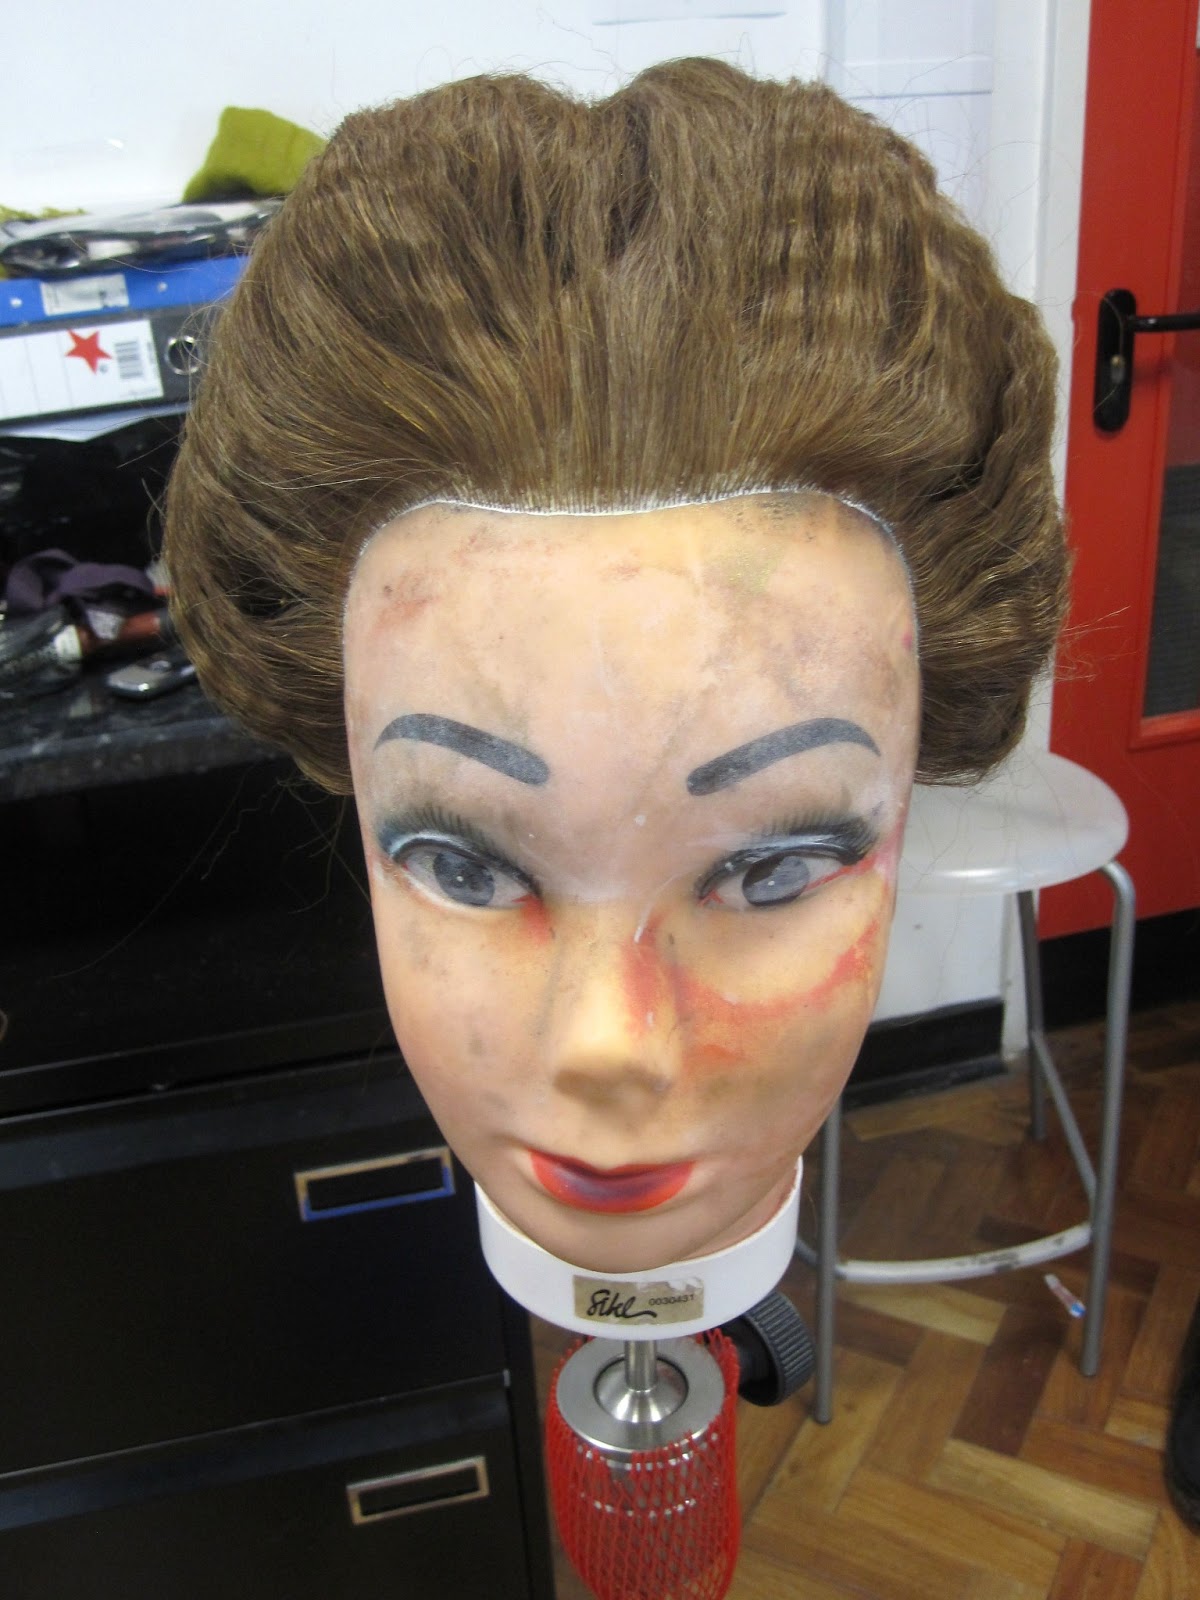
- Model without make-up on -

Step 1: Prepare the model and set up the working station.


Step 2: Apply thin layers of latex on the under eye areas to create some winkles. Must wait for the first layer of latex to dry before applying the second layer. After the latex is dried, put some loose powder on it to avoid the latex stick together. This will also helps the grease paint to blend well afterwards.

Step 3: Mix the lightest colour from Screen Face cream foundation palette with Illamasqua white liquid foundation, apply evenly on the face to create the pale unhealthy complexion. After that, use the darker shade from Screen Face cream foundation palette, apply on the jawline, temples, underneath the cheekbones and around the eyes to achieve the sunken face effect. Then lightly powder the face with Illamasqua loose powder to set the base.

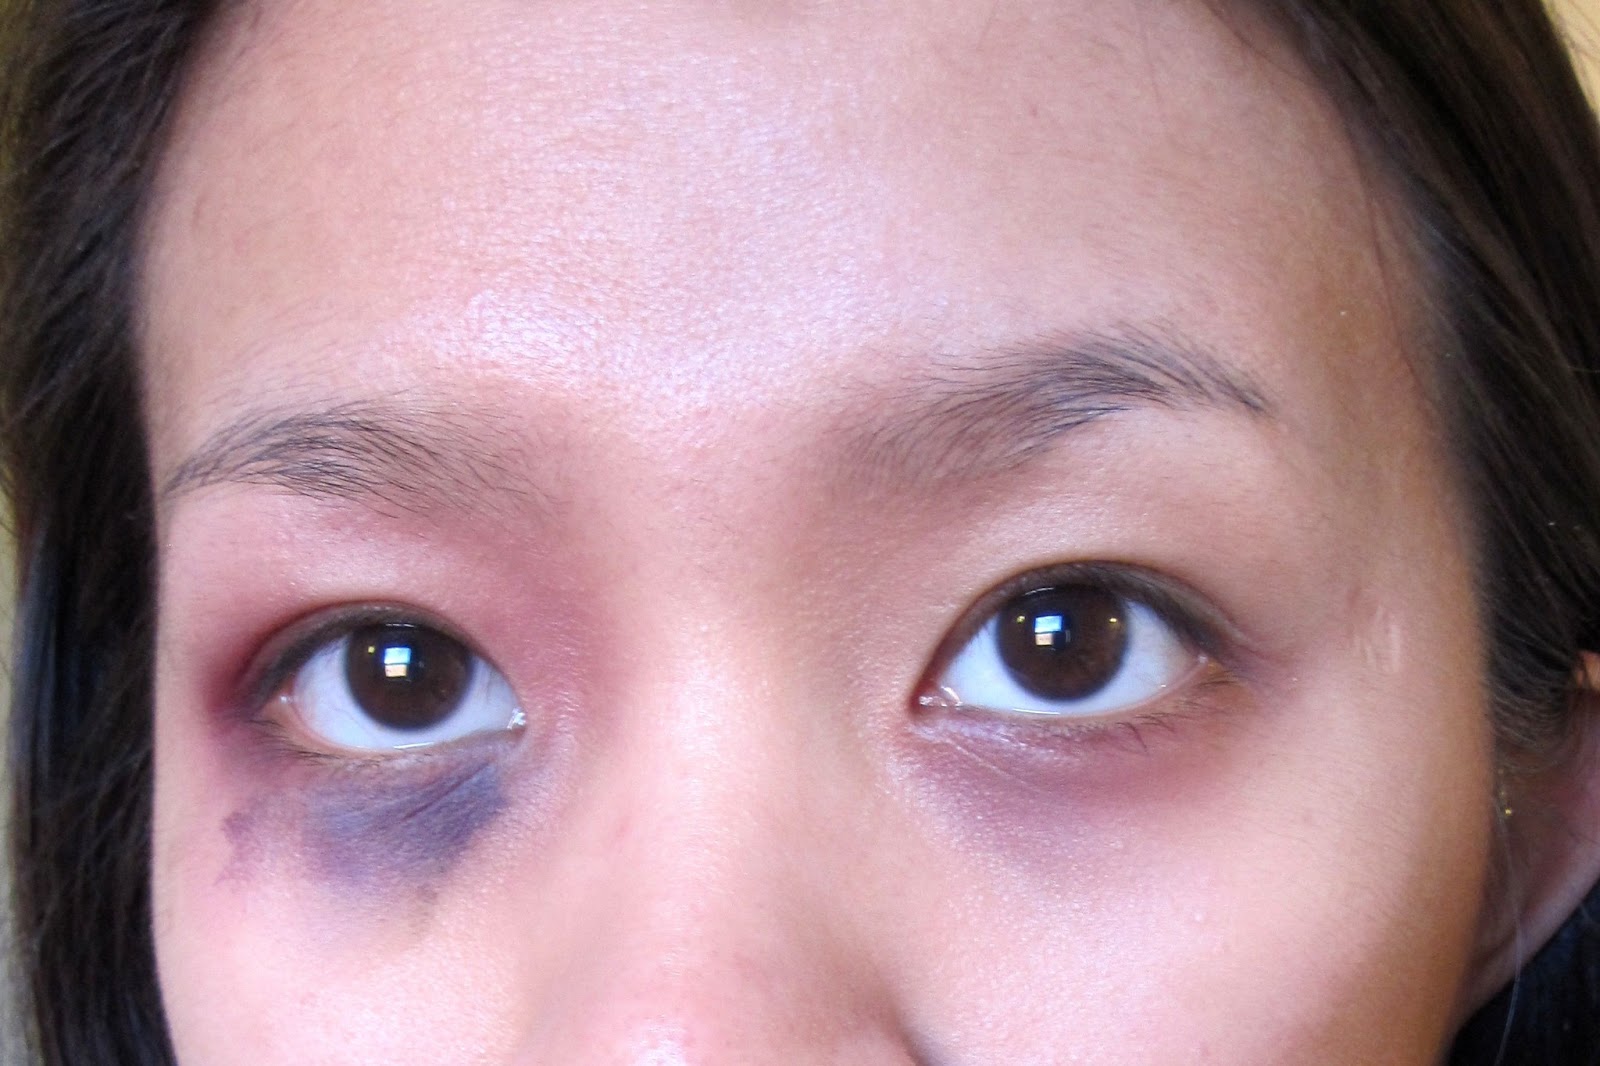
Step 4: Mix purple, blue and brown grease paint from the supra-color palette, apply on the under eye areas to create some dark circle. Also a little bit brown colour on the sides of nose to create nasolabial folds. 

Step 5: Finally, use PVA glue and some grease paint on the lips to create the cracked effect.


Hair Styling Process


Shush! Miss Havisham is sleeping... 


Step 1: Use some heat defence hair spray to protect model's hair from the curling iron.

Step 2: Do a center parting first, then create wavy curls on the top hair and ringlets on the bottom hair. It does not have to be perfect curls, because Miss Havisham's hairstyle is supposed to be quite messy! 

Step 3: Tie the wavy curls hair section back into a hair bun. Then use some hair spray to hold the curls and shape of the hairstyle.

Step 4: This is the best part of this styling process! Use white & gray colour hair spray to change the colour of model's hair. 

Step 5: Finally, pinned on the lace kerchief to complete the wedding look and some yellowing flowers for decorations.


I painted some black coffee on the fake flowers to make them look yellowing and dirty!


Ready to shoot!


Sunday 17 February 2013

Technical Practice - Miss Havisham


Products used: 
Supra-color palette, Screen Face cream foundation palette, Illamasqua loose powder, latex and PVA glue.


Today I did some technical practice on the dark under eye circles. I was trying to create some under eye winkles by using latex on the left eye. Everything works fine until I painted on the grease paint, the colour just won't blend smoothly so it ended up looking caked and weird... ... It fails because of the latex base, so on the other eye I did not use latex. Actually, I am quite pleased with the other eye. I used purple, blue and brown to create the colour of the under eye circle, and because I mixed colour so it will look more real!


I have also experiment with PVA glue to create this cracked lips effect. Basically, I just apply layers of PVA glue on my lips and wait for it to dry a little bit, then put my lips together for 3 or 4 times. It creates this peeling lips effect automatically! However, I will need to avoid putting my lips together too many times as the glue will just stick all together in the end.


I've also tried to create some shadows on my face to achieve the skinny face effect. I used the darker colour from Screen Face cream foundation palette, but the effect is not showing enough by only looking at the images. Maybe I will need to apply some more product next time to ensure that it shows on camera!


Friday 15 February 2013

Miss Havisham Final Make-up & Hairstyle


This is my first make-up template for Miss Havisham. I started by studying the shadow areas on the face that skinny people normally have, and I came out with this look in the end. The hollow cheeks, thin jawline, shadows on the temples, and sunken eyes.


After depicted out the shadow areas on the face, I add the dark circles and winkles around the eye areas. I would like to create more winkles around the eyes, because Miss Havisham has been hurt by love so she must be sad and crying all the time. As she cried, she will be wiping away the tears, and because our eyes skin is really sensitive and gets winkles easily, so this is why she has wrinkled eyes. Purple, cracked lips are also adding onto my Miss Havisham's make-up design. As I mentioned in the previous posts, the coldness and dry air in her house caused these horrible lips. As the lips skin is peeling off, so I will paint some dark red colour on the lips to show the dried blood.


For the hair design, I would like to do a center parting and several ringlets hanging on the bottom. I don't know if you noticed that the hair is not curling from the roof, that is because I want to show that Miss Havisham hasn't been styling her hair since the wedding day, so the new growing hair will be straight. Also, the final look of the hair will be messy and knotted, because since the wedding day Miss Havisham has been slept with this hairstyle and not taking care of her hair anymore.


Thursday 14 February 2013

Final Images of Estella


These are my final images of Estella, I personally think I have done a great job! I love how the skin looks so glowy and smooth, exactly like my model does not have any make-up on her face. I asked my model to look at the side when I was taking pictures, because I think by not looking at the camera it shows the characteristic of Estella. The attitude of arrogant, it's like she just doesn't care if there are people looking at her, she think it's normal because she is beautiful. The picture on the right is when Estella was beaten by her husband. I asked model to look down, because it shows the emotion of regrets.


Wednesday 13 February 2013

Create Estella Final Look


Make-up Process


-Perfect Base-


Step 1: Clean and moisturizing the face really well, as it helps creating the perfect base.

Step 2: Use Screen Face cream foundation palette, apply with Real Techniques expert face brush to get the flawless finish to the skin.

Step 3: Use the concealer palette to conceal spots or anything which need to be concealed.

Step 4: Set the base with a small amount of lose powder. I didn't put a lot of lose powder on the face because I want to achieve the natural glow finished. I don't want it to look powdery as our skin won't look like that when we are not having make-up on.


After created the perfect base for Estella, I used No.7 Lash & Brow Perfector on model's eyebrows and eyelashes, just to keep them in place and look tidy. 

For the final step, I used Benefit Benetint and dab it on with my finger on the inner of the lower lip to create the redness. 


Hair Styling Process


Step 1: Curl hair in small sessions with curling iron. Use hair spray to keep the curls in place.

Step 2: Session the hair from the middle of the ears, then create some volume on the top.

Step 3: Pull one small session of hair out from the back, placed it to the front. Then tie the rest of the hair into a bun.

Step 4: Re-curling the left out hair pieces into several beautiful falling ringlets.

Step 5: Decorate with some small paper made flowers on the side of the bun.


Saturday 9 February 2013

Estella Final Make-up and Hairstyle


This is my final make-up chart for Estella. Basically, I will be concentrating on the base for Estella's make-up. I will create a perfect pale skin with cream foundation because cream foundation gives more coverage to the face so I won't need to use a lot of concealer afterwards. For the other parts of the face, I am thinking not to do anything to them, I want to keep this make-up look really natural, like the model is not wearing any make-up at all. However, I will shape the model's eyebrows into a beautiful neat shape if I need to. To show the evidence of my Estella bites her lips because of the complicated emotions inside her thought, I will create some redness on the inner of her lower lip.


After I photograph the beautiful side of Estella, I will add some bruises on model's face and body. I am going to create only one bruise on Estella's face and the rest on her body, because when people first get hit by someone on their face, they will automatically protect their face using the other parts of their body.


For the hairstyle, I want it to look romantic and elegant. I am going to create several falling ringlets on the side of the face and one from the back. For the rest of the hair, I will tie them up into a bun and decorate with some flowers. 


Thursday 7 February 2013

My Miss Havisham Design Ideas


Under eye dark circles 


I would like to create under eye dark circles for my Miss Havisham because her life clock stops at twenty to nine on her wedding day, since then she doesn't have the concept of time. As this happening, she will not have enough sleep because she doesn't know when to go to bed. She will only fall asleep for a short time when she is too tired to continue being awake.


Skinny


As Miss Havisham has lost her time of life, so she will not be eating properly neither. I will try to creating some shadows underneath the cheekbones to show the emaciated face, also some shadows on the collar bones so the whole image looks equilibrium. The picture above are twins Maria and Katy. They are only in their thirties, but they look much older than their actual age. This proves that when people are too skinny, they will look older and unhealthier. With this in mind, I will try to make my Miss Havisham looks elderly , although Dickens's own notes indicate that she is only in her mid-fifties.


Cracked Lips


Miss Havisham is wearing her wedding dress all the time in her cold ruined mansion. Although she seems not feeling cold but her body reacts. In order to show this, my Miss Havisham will have cracked bleeding lips, because when people stay in a freezing place their lips colour turns slightly pale, purple and becomes really dry.


Images from:
http://www.tumblr.com/tagged/cracked%20lips
http://news.gamme.com.tw/215096
http://haircut-latesthairstyles.blogspot.co.uk/2012/04/dark-circles-under-eyes-beauty-tips.html


Technical Session- Victorian Hair Style 2


Victorian Gothic Hair- Ringlet and Up Styles


Step 1Section the hair from the middle of the ears, and tie the rest of hair to the back. Pull some hair out on below.

Step 2: You can neither do a center parting or no parting.

While doing these two steps, pre-heating the curling iron!

Health and Safety: Do not put the curling irons anywhere near the makeup products!


Step 3:

Start with the center parting, take a small section of the hair, and curl the hair from the same direction of the parting. Pull the hair up and curl it down, remember not to do it too tight as it will be difficult to remove. Then use the back of the comb to help you remove the hair from the curling iron. Continue doing the rest of the front hair, but curling in different directions between each one. For the side, can either continue doing the same or create several falling curls on the side. To create the falling curls, hold the curling iron vertically. 


Step 4:

Tie the rest of the back hair into a bun. Use some hair grips around the hair band, this will make sure the hair stays up and tight. Back combing it to create volume, then fold it over and put some hairpins to secure it. Do it in several small sections around it, so you can be able to cover the hair band. Finally, create some falling curls on the bottom hair.

Health and Safety: 
Use a comb between the curling irons and the scalp to avoid scald. Be really careful when curling around the ears.


Wednesday 6 February 2013

Practice Creating Bruises!


As for my Estella character, I will need to create some bruises on her face and body to show the stage of when she's married to Bentley Drummle.

Here are some images of me practicing on creating bruises!


Product Used: Supracolor palette, sponges, stipple sponges, and makeup brushes.

Safety Notes: Be careful when putting makeup product around the eyes, ask model to close their eyes.

Important things to know: 

It’s best to create the look while looking at a real life image. Continuity is really important as the color and wounds will look different when the time gone. Discuss with the director about how the actor/actress gets injured in the film, this will help you designing the look of the wounds. The sharp points of the body are the places where injured the most!


Step 1: 
Use orange/red color all over the injure place with a sponge as the first layer of the bruise. 

Step 2: 
Then use purple on top of the first layer but apply only on the sharp point (where the bone is) and around it.

Step 3: 
Use green on the sharp point of the body to show that this is the place where injured the most.


Tuesday 5 February 2013

My Estella Character Design Ideas


For my Estella character, I would like to create two design look for her. One is before her marriage with Bentley Drummle, the beautiful and haughty version of Estella. Another version is after the marriage, been beaten by her husband Bentley Drummle.


Before the marriage, she will look pretty as she meant to be in to story. I will do a non-makeup makeup look for both versions of Estella, because in the Victorian period women were not allowed to wear makeup on their face. 

As I said earlier on the previous posts about I will try to do some research on what peculiarities would people have when feeling stressed, because Estella is always under the pressure which Miss Havisham applies on her. Another reason of me doing this is because I feel like there is no characteristic for my  Estella if I only create a Victorian lady's makeup look on her. 


After I did some online research, I found out that some people bite their lips when they are feeling under pressures! It's a common behavior that many people don't even realize they're doing, and other struggle to control. As they bites their lips too hard or too often, the inner lips will looks a little bit red, raw or bleeding. I think this is a really great element to put into my makeup design for Estella, and it gives soul to this character! If I didn't do this research, she could be any ladies from the Victorian era. 


For the second look, which is after the marriage with Bentley Drummle. Estella will be beating by Drummle at this stage. To show this, I decide to create some bruises on her face and body using makeup products. 


Images from: 


Monday 4 February 2013

Technical Session- Victorian Period Hair Styles


Victorian Gothic Hair- Crimping and up hairstyles

Victorian Hairstyles Short Hair Victorian Hairstyles for Women

Last week in my uni's technical session of this project, we did some practices on Victorian crimping and up hairstyle. Here are some images and notes of how to create this hairstyle!


   Crimp the Hair

1) Crimp the hair from the bottom to the top.
2) Avoid being too close to the skin and scalp, also around the ears.
3) When doing the top hair, pull the hair up so you can get into the bottom bits.


   Rolling the Hair

Front: 
Divided the front hair into 3 parts, start with the middle part. Rolling the hair downwards with  hands and secured with hair pins. (Avoid putting too much hair pins as they will pull the hair down as it’s too heavy!) Then do the same to the sides.

Back: 
Divided the back hair into 2 parts, start with the upper hair do the same as the front hair rolling them downwards. For the rest of the bottom hair, roll them upwards not downwards.


The Complete Look